Download Genome Files
Data for most tracks in MotifLab are usually downloaded from remote web servers, either the MotifLab web site or the UCSC Table Browser.
Getting the data can thus be time-consuming if you are analysing many sequences or very large sequence segments.
The most efficient way of obtaining data is to instead import it from local files stored in binary and indexed formats, like 2bit, BigBED and BigWig.
This plugin will allow users to easily download genome-wide data files for a few selected tracks and perform the necessary configurations to use them with the click of a button.
Adding new tracks
-
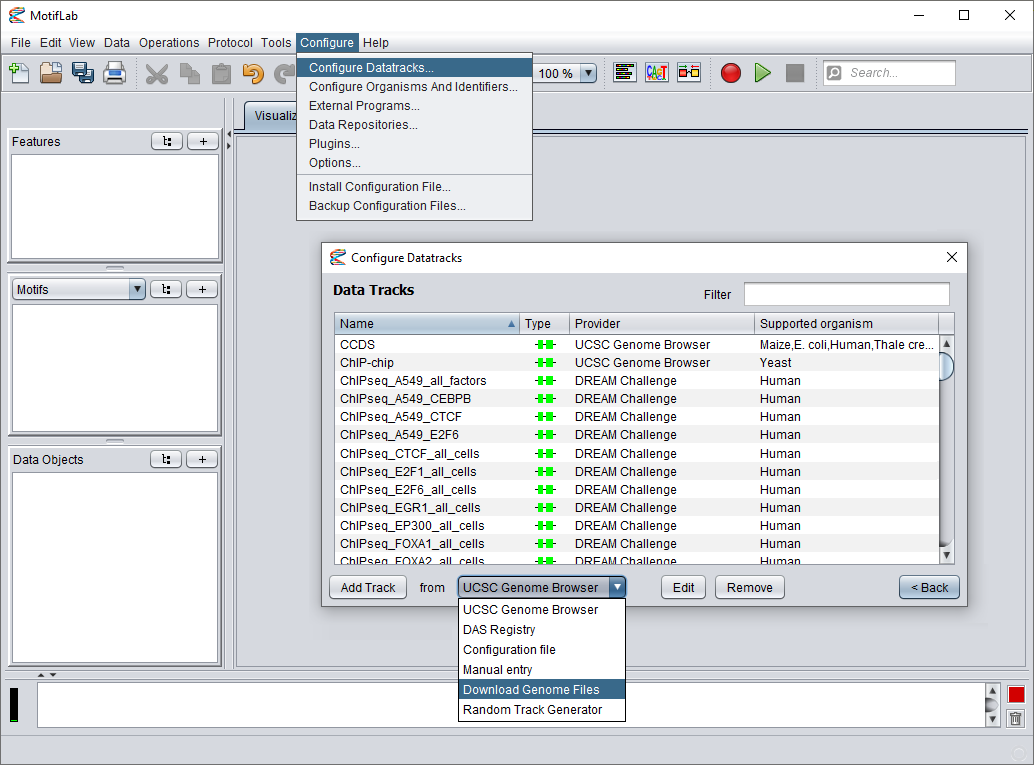
Go to the Configure menu and select "Configure Datatracks...". In the dialog that appears next, press the first "Configure Datatracks and Sources" button.
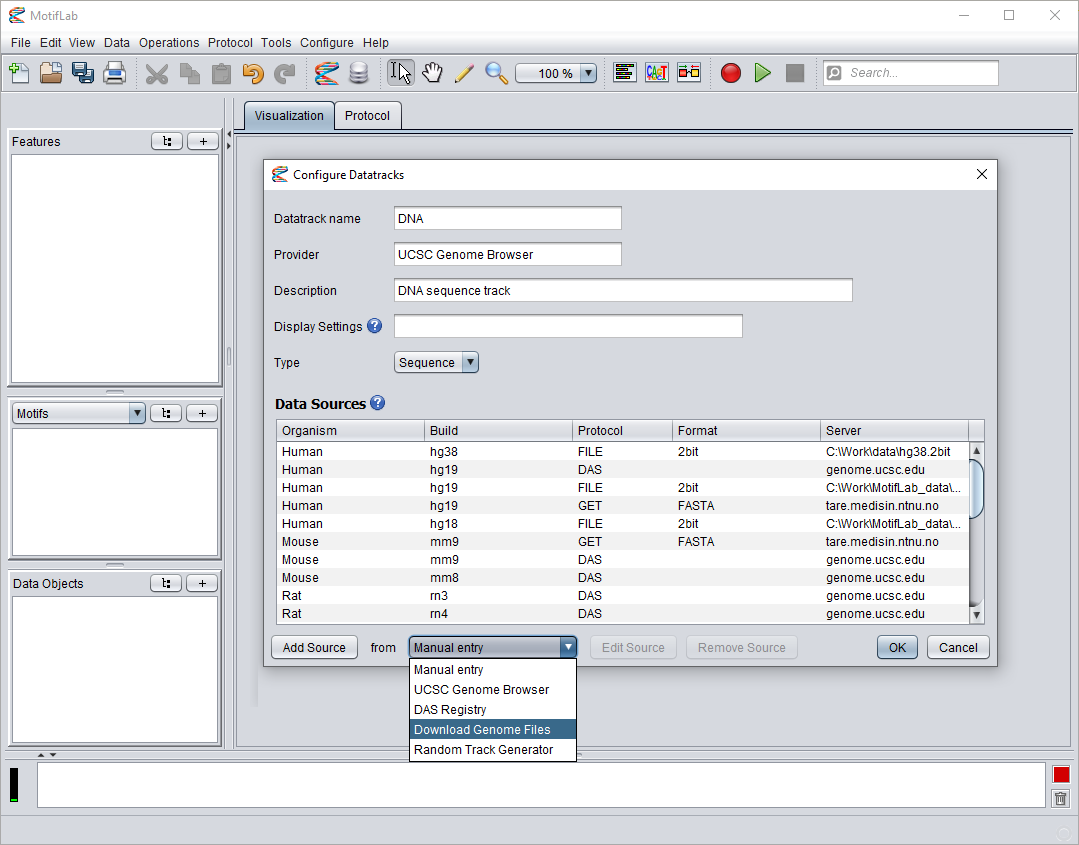
This will bring up the "Configure Datatracks" dialog and show you a list of the currently available tracks. From the drop-down menu at the bottom of the dialog, select "Download Genome Files"
(Note that this option will only be available after you have installed this plugin). Finally, press the "Add Track" button to bring up a new dialog.
-
The second dialog shows you a list of data files you can download.
Click the boxes in the first column to select which datasets to install.
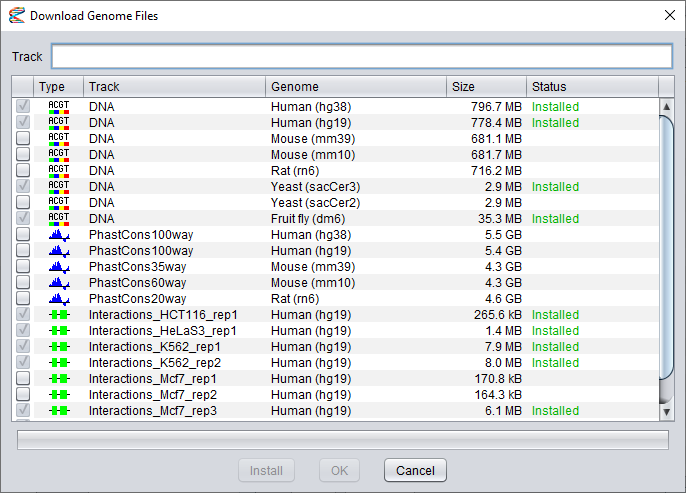
Note that once you have selected the first dataset, you will only be able to select other files for the same track (for other genome builds).
It is not possible to install datasets of different types at the same time. Also, files that have already been installed can not be selected again.
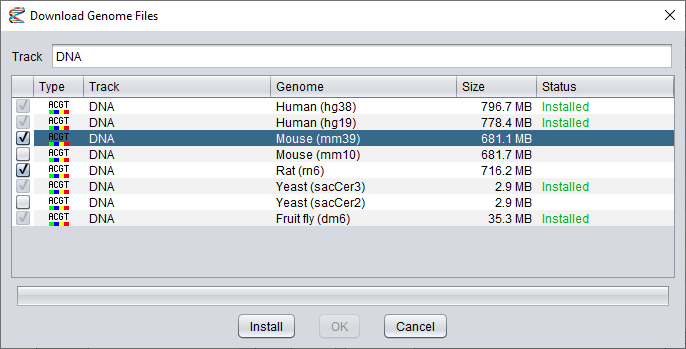
The name of the selected track will be shown in the text field at the top of the dialog, but you can edit this field to give the data track a new name, if you want to.
-
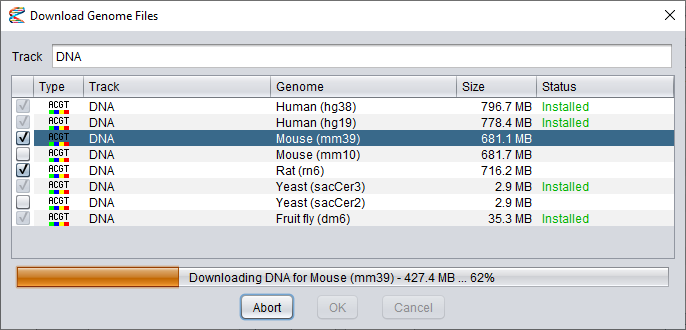
After you have selected your datasets, press the Install button to start the download process.
The progress will be shown in the progress bar beneath the dataset list. At this time, the Install button will have changed into an Abort button that you can press if you want to cancel the installation.
When the installation is finished, you can press the OK button to complete the configuration or Cancel to discard the changes.
-
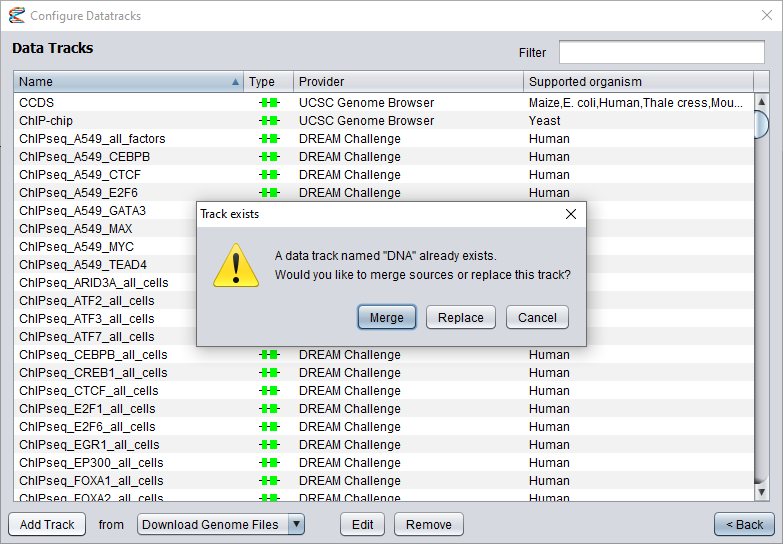
If you selected a track that did not exist from before, the dialog will simply close without further notice. However, if you have selected datasets for a track that already exists (or changed the track name in the dialog
to a track that already exists), you will be given a few options on how to proceed next. If the existing track is compatible with the newly installed datasets (i.e. they have the same data type),
you have the option to merge the tracks by adding the new data sources into the existing track.
If you select this option, the new data sources will be given priority over the existing sources for the same genome builds (since they are assumed to be more efficient),
but the existing sources will be kept as fallback options if the new sources fail to deliver the data. You can also choose to replace the existing track with the new datasets.
This is usually not recommended, since it will discard any existing data sources from the old track. However, if the new track is not compatible with the old track, replacing it will be your only option.
Add data sources to existing track
You can add new data sources to existing tracks by clicking the "Add Track" button as described above, select datasets to install and then choose "Merge" sources afterwards.
But you can also double-click on an existing track to edit it and see a list of its configured data sources. Select "Download Genome Files" from the drop-down menu and press the "Add Source" button.
Only datasets that are compatible with the selected track will be shown in the list, and the name of the track can not be changed. Follow the procedure described above to select and install new datasets.
The new sources will be merged with the existing track and given priority over previous data sources.
Configuring the data directory
By default, the downloaded datasets are stored in the plugin's system-directory, but it is possible to select a different location for the data.
Go to the Configure menu in MotifLab and select "Plugins...". Select the "Download Genome Files" plugin from the list and press the Configure button.
In the dialog that appears, enter a new directory location and press OK.
NB: If you store data in the plugin's directory (the default location) and then later uninstall the plugin, all the data that was stored there will be deleted as well!
